Monday, 26 October 2015

Maybelline Matte + Poreless Fit Me foundation | First Impression

Hello lovelies!

Im back with another first impression post!

There has been a lot of hype about the new Maybelline Fit me foundations, So of course I had to add it to my collection.

I went to my local Coles when they were having a half price sale and got the Matte + Poreless foundation as I find my skin can get very oily, especially when I don't use matte foundations. the colour I wanted wasn't in stock so I went with Sun Beige. Its definitely too dark I, but I have managed to mix it with some of my lighter foundations so I can wear it.


Lets get straight into it!

Product claims

- For normal to oily skin
- Mattifies and refines pores
- Matches natural tone
- Natural, seamless finish 


The packaging is very nice, however I do wish it had a pump.

Application

The product applies really nicely. Its easy to blend and gives medium to full coverage.
I found it didn't try too quickly to give you time properly blend out the foundation.
It felt light on the skin and very comfortable.

7 and 1/2 hours later

I had been at work all day and checked my face just before I was heading home.
I noticed that the foundation had separated on my chin and nose. You could start to see my pores and blemishes.
My skin no longer had a matte finish as the shine had come through, especially on the forehead.

10 hours later 

I left the foundation on for a few more hours once I had been home.
It had completely come off my chin, and my whole face felt very oily and looked super shiny.
It didn't feel thick or heavy, but it didn't look nice.

The verdict

Even though the matte effect of the foundation didn't last all day, I was still happy with the foundation. I loved the way it applied and made my skin look. I have worn this many times since, and after simply applying powder throughout the day to keep the shine at bay really helps.

As the product doesn't state that it lasts for a specific time frame, I can't say this product doesn't do what it states.

For a drug store product, I think its definitely a great foundation. If you had normal skin, I think you would really love it! Considering I got it half price, Im not to fussed about the matte effect not lasting all day. As its too dark, I will wait until it is on sale again to get the lighter shade.

Whats your favourite matte foundation? Id love to do more first impressions so leave a comment down below!

xx Luct


Monday, 12 October 2015

Every day make up look | Tutorial

Hello lovelies!

I usually wear the same style of make up as my "every day" make up look as I go to uni 4 days a week and my job doesn't require me to wear a full face of make up


(Maybelline, Australis NYX, Essence, Rimmel and Chi Chi products purchased from Kmart, Target and Priceline. MAC purchased from MAC store. LA girl purchased from Crush Cosmetics. Duwop lip venom purchased from Luxola. )

(purchased from Makeup Geek)

I really love this style of make up as it is simple and quick to do and its easily changed into a night or more dramatic look by adding in some eyeliner and a bolder lip 

I thought I would share with you how I achieve this look and show you just Just how easy an every day look can be!

Base 
 I use the LA girl PRO conceal in Natural and I apply it to the areas I want to conceal, usually the broken capillaries near my lips, and any small spots I might have. I just blend this out with my finger.

I then apply my MAC Studio Fix foundation in the shade NW20 with a flat top foundation brush (rose gold brush set)  from Crush Cosmetics .  I dot the foundation all over my face, and then in a stippling motion I blend it out over my face but avoiding the under eye area. 

Then going in with my Maybelline Fit Me concealer in "light" and applying that to my under eye area, dot on the tip of my nose, in the dent of my chin and in the middle of my forehead in a triangle shape


I then blend this out with my e.l.f stippling brush. Using my Australis Cosmetics AC ON TOUR kit I take the "banana" shade on the small blush brush from the Crush Cosmetics rose gold brush set. I use this to set under my eyes in a dabbing motion. 

Then taking the darkest shade on my powder brush from the Crush Cosmetics rose gold brush set, I bronze my cheek bones in a fast swirling motion. This is similar to contouring but not as defined


Next is my favourite part, the brow transformation!
I have found my holy grail brow product, I literally can't use anything else (so far) that I like as much is the Poni Cosmetics brow dust in Thoroughbred!

(purchased from the 2014 Beauty Expo)

I use a very small amount on the angled eyeliner brush from the same rose gold brush set (can you tell I love it?). I carefully outline my brows, creating a defined arch and square off the beginning of my brows.


Now that I don't feel naked, Its time for the eyes!

I used my new Makeup Geek individual pan eyeshadows Baby Face, Creme Brûlée, Frappe and Shimma Shimma, and the foiled shadow In The Spotlight
First taking Baby Face on the Medium eyeshadow brush from the rose gold brush set, I applied that all over my eyelid and up to my eyebrow. This creates a base for the rest of the eyeshadows to blend out evenly.
Then taking Creme Brûlée on the xo Beauty Round Top Blender and blend that colour on and above the crease line
Once thats blended out, I took Frappe and used that with the blending brush from the rose gold brush set and blended that right into the crease line, being sure not taking it above the crease.
Then on the small eyeshadow brush again from the rose gold brush set, I took Shimma Shimma and applied it all over the bottom lid. I didn't want this to go into the crease at all.
To blend it all out nicely I took the xo Beauty Round Top Blender and blended along the crease line again, using only what was left on the brush. 
Lastly I took In The Spotlight on my finger and dapped it right in the centre of my lower lid
And thats it!


For mascara I used the Maybelline Lash Sensational mascara, Its my current favourite!

 This is when I applied the highlighter, I like to wait and see how my eyes turn out to do this.
I just dapped Essence Soo glow cream to powder highlight in "look on the bright side"
and on the bone area under my eye.

Next is blush to make my cheeks pop! I used the NYX baked blush in "foreplay" on my xobeauty medium domed face brush and in light swirling motions move from the tops of my cheek bones down into the middle of my cheeks, not taking it too far come to my nose as you just want to define the mid section. 


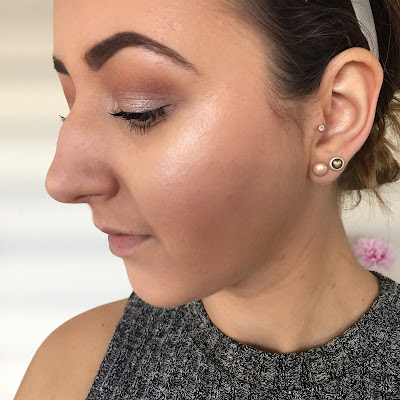
Isn't it beautiful! I love the pink tones with gold flecks, its pretty much what i use every day!


Lastly, but certainly not least, is the lips!
This is really simple, I just took a nice shade. I chose the Rimmel, Kate Moss lipstick in "Rossetto" no. 38. I lined my lips first with the Chi Chi "It Girl" lip liner and then applied the lipstick. to finish the look off I used a Lip Venom by DuWop to add some fullness to my lips!


and thats it! 


I love this look for work, or when I don't have any thing specific to do and just want to freshen up my face.

Whats your favourite everyday look?

Link me to your blogs/youtube of any looks you have done!

xx Lucy